
从0写若依管理后台(踩坑版)
前言因为自己刚学完 vue3 的课程,还没有具体的项目来练手,就想着拿着市面很很火的 “ruoyi” 后台管理来练手。我选选择的官网前后端分离版本。但是我需要包含接口文档的,这个仓库本身本身有引入 swagger,但是并没有完全实现,只给了实例,因此我将源代码整合了整合 swagger + knife4j ,并且实现了全部接口文档,整合后的代码仓库地址放到文章最后。官网前后端分离版本(包含接口文档
前言
因为自己刚学完 vue3 的课程,还没有具体的项目来练手,就想着拿着市面很很火的 “ruoyi” 后台管理来练手。我选选择的
官网前后端分离版本。但是我需要包含接口文档的,这个仓库本身本身有引入 swagger,但是并没有完全实现,只给了实例,因此我将源代码整合了整合 swagger + knife4j ,并且实现了全部接口文档,整合后的代码仓库地址放到文章最后。
官网前后端分离版本(包含接口文档)。
注意一点:
- 数据库相关 sql,自己在创建完数据库后在执行;

- 自己根据配置文件修改 mysql 的链接地址和数据库名称,还有 redis 的地址;

环境介绍
| 类别 | 详情 |
|---|---|
| 电脑及系统版本 | MacBook Pro Apple M1 Pro、14.1.2 |
| node 版本 | v18.20.2 |
| 下载工具 | pnpm |
| 框架 | vue3 |
| 构建工具 | vite |
| 组件 | Element-plus |
| 开发工具 | WebStorm 2024.1.2 |
| TS的语法 | 没有使用,纯 JS |
开始前建议
项目创建
- 项目创建
pnpm create vite
- 设置项目名称
ruoyi-ui
- 框架选择
vue
- 数据类型选择
JavaScript
- 创建完成

开发工具打开项目
- 开发工具中打开项目

- 安装相关依赖(注意是项目的根目录下)
pnpm install
- 运行项目
pnpm run dev
- 点击链接

创建企业开发项目目录
- 删除项目本身自带的文件
删除前:
删除后:
- 删除 App.vue 中没有的代码
删除前:
删除后:
- 创建目录
api --- 后台接口
assets --- 相关资源(图片等)
component --- 组件
layout --- 布局
plugins --- 插件
router --- 路由
views --- 视图(页面)
登录/注册页面
- 创建登录/注册页面


- 根目录配置
在开发期间我们为了便于文件之间相互引用,一般是相对路径/绝对路径,再不然是项目根路径,我们一般都只在 src 目录下开发,所以我们配置一个‘@’符号表示 src 在项目中的路径,因此在表示路径的时候只需要‘@/views/login.vue’,就可以指向该文件。下面有具体的引入和使用。- 设置“@”
import { fileURLToPath, URL } from 'node:url'
resolve: {
  	// 别名
    alias: {
      // 设置 @ 符号为 ‘src’的根路径
      '@': fileURLToPath(new URL('./src', import.meta.url))
    }
}
- 使用方式
后面的文章中有具体的使用方式,这里不做示例。
- 设置“@”
- 配置路由
-
安装路由插件(官方文档)
pnpm add vue-router@4
-
创建路由,并配置登录与注册的路由
import { createWebHashHistory, createRouter } from 'vue-router'

// 路由地址信息
const routes = [
	{ path: "/login", component: () => import('@/views/login.vue') },
	{ path: "/register", component: () => import('@/views/register.vue') },
]

// 创建路由
const router = createRouter({
	// 忽略路由器的 URL
	history: createWebHashHistory(),
	// 配置路由信息
	routes,
})

export default router
-
将路由注册到项目中
import router from "@/router/index.js";

createApp(App)
	.use(router)
	.mount('#app')
-
将路由模块的页面引入到主页面中
<router-view />
-
测试页面是否配置成功


OK,完成。
-
引入Element-Ui-plus
- 官方文档
Element-Ui-plus - 安装
pnpm install element-plus
- 导入(我选择按需导入,也是官方推荐)
- 这里用到了官方插件,实现按需导入
pnpm install -D unplugin-vue-components unplugin-auto-import ```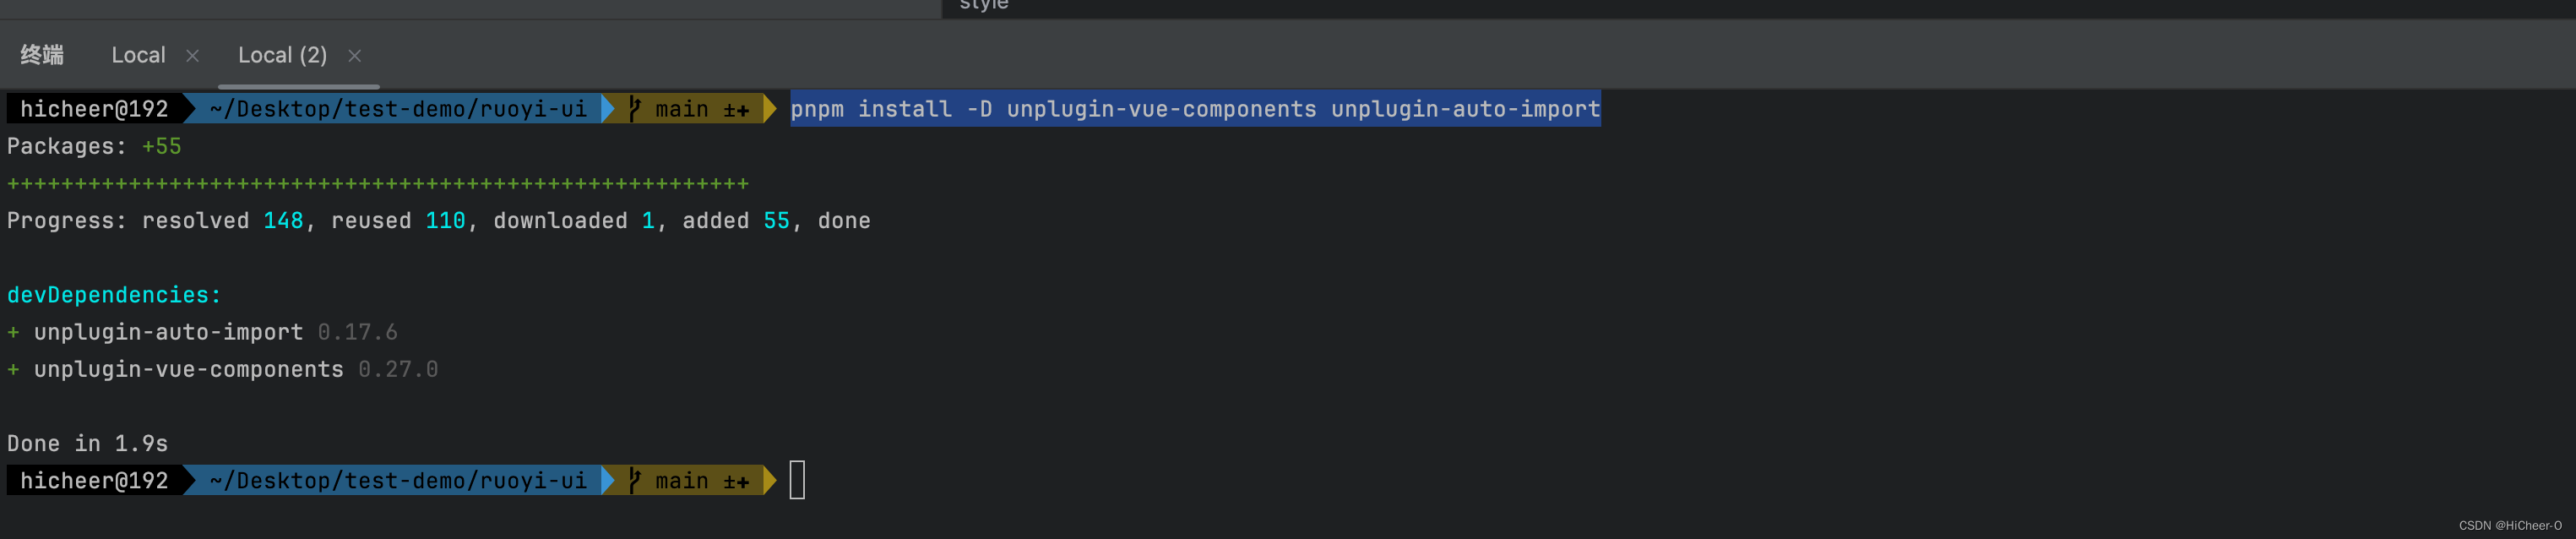 - 配置插件
import AutoImport from 'unplugin-auto-import/vite'
import Components from 'unplugin-vue-components/vite'
import { ElementPlusResolver } from 'unplugin-vue-components/resolvers'

AutoImport({
	resolvers: [ElementPlusResolver()],
}),
Components({
	resolvers: [ElementPlusResolver()],
})
- 这里用到了官方插件,实现按需导入
优化登录注册页面
注意:如果页面不会写,建议使用 ChatGPT 帮你生成一些基础的页面,再配合 Element-plus 官方文档进行调整,因为我就是这样开发的。
- 美化登录页面
- 基础美化
<script setup>
import { ref } from 'vue';
import 'element-plus/theme-chalk/index.css';

// 初始化表单
const userForm = ref({
  username: '',
  password: '',
  captcha: '',
});

// 收集表单参数
const form = ref()

// 表单规则检验
const userFormRules = {
  username: [
    { required: true, message: '请输入您的账号', trigger: 'blur' },
  ],
  password: [
    { required: true, message: '请输入您的密码', trigger: 'blur' },
  ],
  captcha: [
    { required: true, message: '请输入验证码', trigger: 'blur' },
  ]
}

const captchaUrl = ref('');

const refreshCaptcha = () => {
  // 这里可以添加刷新验证码的逻辑
  captchaUrl.value = '';
};

// 登录提交
const onSubmit = async () => {
};

</script>

<template>
  <div class="login-container">
    <el-form
        :model="userForm"
        :rules="userFormRules"
        ref="form"
        label-width="0px">
      <h3 class="title" style="color: #707070">若依后台管理系统</h3>
      <el-form-item prop="username">
        <el-input
            v-model="userForm.username"
            placeholder="账号"
        >
        </el-input>
      </el-form-item>
      <el-form-item prop="password">
        <el-input
            v-model="userForm.password"
            type="password"
            placeholder="密码"
        >
        </el-input>
      </el-form-item>
      <el-form-item prop="captcha">
        <el-row :gutter="20">
          <el-col :span="14">
            <el-input
                v-model="userForm.captcha"
                placeholder="验证码"
            >
            </el-input>
          </el-col>
          <el-col :span="10">
            <img :src="captchaUrl" alt="captcha" @click="refreshCaptcha" class="captcha-img" />
          </el-col>
        </el-row>
      </el-form-item>
      <el-form-item>
        <el-button type="primary" @click="onSubmit" style="width: 100%;">登录</el-button>
      </el-form-item>
    </el-form>
  </div>
</template>

<style scoped>
.login-container {
  max-width: 400px;
  margin: auto;
  padding: 20px;
  background: white;
  border-radius: 8px;
  box-shadow: 0 2px 12px rgba(0, 0, 0, 0.1);
}
.captcha-img {
  cursor: pointer;
  border: 1px solid #dcdfe6;
  height: 40px;
}
</style>
页面展示
- 进阶(在 input 输入框上加图标)
安装 element-icon 库官方文档pnpm install @element-plus/icons-vue
根据官方文档说明插入
input 官方文档
我的代码

- 基础美化
- 美化注册页面(这里就不贴代码了)


- 登录页面与注册页面相互跳转
- 登录页面跳转注册页


- 注册页面跳转登录页面


- 登录页面跳转注册页
配置统一发送请求对象
- 安装axios
官网地址pnpm install axios
- 创建
request.js类
添加添加公共方法、设置请求基地址(baseURL),设置拦截器import axios from 'axios' // 请求地址 const baseURL = 'http://localhost:8080' // 公共请求方法 const instance = axios.create({ baseURL, timeout: 5000, }) // 添加请求拦截器 axios.interceptors.request.use(function (config) { // 在发送请求之前做些什么 return config; }, function (error) { // 对请求错误做些什么 return Promise.reject(error); }); // 添加响应拦截器 axios.interceptors.response.use(function (response) { // 2xx 范围内的状态码都会触发该函数。 // 对响应数据做点什么 return response; }, function (error) { // 超出 2xx 范围的状态码都会触发该函数。 // 对响应错误做点什么 return Promise.reject(error); });
这些在官网都有介绍,直接拷贝使用,具体的拦截器逻辑自己根据业务实现。
获取验证码
- 首先是要在本地将
ruoyi项目启动起来的
接口文档地址http://localhost:8080/doc.html#/home
例如:验证码,
接口地址的前缀http://localhost:8080
接口的名称/captchaImage
登录接口
- 分析接口文档

请求参数{ "code": "", // 验证码(这个是获取验证码图片后,根据图片计算出来的) "password": "", // 密码(默认:admin123) "username": "", // 账户(默认:admin) "uuid": "" // uuid(之前在获取的验证码的时候,返回来的参数) } - 分析相应结构
首先,调用一下接口
注意:{ "code": "", // 自己调用获取验证码接口自己填写 "password": "admin123", // 密码(默认:admin123) "username": "admin", // 账户(默认:admin) "uuid": "" // 自己调用获取验证码接口自己填写 }uuid与code他们呢是一组对应的,而且用完后后台会将 uuid 从 redis 中清除,为了方便调试我们可以直接不做跳过验证码校验。
注释掉,重新启动,就不会做验证码校验。 - 然后分析一下返回结果

只需要成功,拿到 token 就可以。 - 想一些问题
- token 存哪里,如何做持久化
我们一般是将 token 存入到浏览器的Local storage中的,当然也有放到浏览器的Cookies中的,我们这里将他放到Local storage
- 后面我们所有请求都是需要 token
先给思路,我们只需要放到请求前置拦截器中,token 就从Local storage中取就可以了,后面有具体实现步骤
- token 存哪里,如何做持久化
- 先发送请求,获取到 token
创建user.js
绑定到// 用户相关的,登录、登出、注册、获取用户信息、修改用户信息 import request from '@/utils/request.js' // 登录 //请求参数 obj示例:{"code":"","password":"","username":"","uuid":""} export const login = (obj) => { return request({ url: '/login', method: "post", data: obj }) }login.vue页面的登录按钮上
import {login} from "@/api/user.js"; // 登录提交 const onSubmit = async () => { // 校验参数 await form.value.validate(); // 请求准备、发送请求 const data = await login({ "code": userForm.value.captcha, "password": userForm.value.password, "username": userForm.value.username, "uuid": captchaInfo.value.uuid }) // 打印 token console.log(data.token) }; token持久化
我这里使用的 vue 配套的pinia,pinia(pinia 官方文档)默认是默认保存到内存中的,也就是刷新页面,就会被清除;可以通过配置持久化到Local storage。
-
安装


pnpm install pinia pnpm install pinia-plugin-persistedstate -
引入(这里和上面有点区别,因为考虑到后续为了方便引入更多的插件)

import { createPinia } from 'pinia'
import piniaPluginPersistedstate from 'pinia-plugin-persistedstate'

const pinia = createPinia()
pinia.use(piniaPluginPersistedstate)

export default pinia
import { createApp } from 'vue' import "./style.css" import 'element-plus/dist/index.css' import App from './App.vue' import router from "@/router/index.js"; import pinia from "@/store/index.js"; const app = createApp(App); // 添加路由 router app.use(router) // 添加 pinia app.use(pinia) // 挂载 app.mount('#app') -
创建
store
什么是store,根据官方文档上看,其实就是一个实体对象,里面定义唯一的标识id,类中的参数,操作参数的方法等
首先创建文件user.js(根据自己模块块起这个文件名)
import { defineStore } from 'pinia'
import { ref } from 'vue'

export const tokenStore = defineStore(
 // store 唯一标识
 'token',
 // 对外暴露信息
 () => {
   // token 初始化
   const token = ref('')

   // 设置用户 token
   const setToken = (newToken) => {
     token.value = `Bearer ${newToken}`
   }

   // 移除用户 token
   const removeToken = () => {
     token.value = ''
   }

   // 对外提供 store 信息
   return {
     token,
     setToken,
     removeToken
   }
 },
 // 选项配置
 {
   persist: true // 持久化
 }
)
最后在
index.js中统一导出
// store 统一管理模块下 export * from './module/user' -
将我们获取的
token持久化
import {tokenStore} from "@/store/index.js"; // token 持久化存储 const userToken = tokenStore() userToken.setToken(data.token) -
测试一下是否存入到了
Local storage
OK 了
页面布局
- 清除默认的样式
我们需要请求 vue 创建给我们的 css 样式、以及默认各种标签中自带的样式- 创建重置默认标签样式文件
reset.css
/* CSS Reset */ html, body, div, span, applet, object, h1, h2, h3, h4, h5, h6, p, blockquote, pre, a, abbr, acronym, address, big, cite, code, del, dfn, em, img, ins, kbd, q, s, samp, small, strike, strong, sub, sup, tt, var, b, u, i, center, dl, dt, dd, ol, ul, li, fieldset, form, label, legend, table, caption, tbody, tfoot, thead, tr, th, td, article, aside, canvas, details, embed, figure, figcaption, footer, header, hgroup, menu, nav, output, ruby, section, summary, time, mark, audio, video { margin: 0; padding: 0; border: 0; font-size: 100%; font: inherit; font-weight: normal; vertical-align: baseline; } /* HTML5 display-role reset for older browsers */ article, aside, details, figcaption, figure, footer, header, hgroup, menu, nav, section { display: block; } ol, ul, li { list-style: none; } blockquote, q { quotes: none; } blockquote:before, blockquote:after, q:before, q:after { content: ''; content: none; } table { border-collapse: collapse; border-spacing: 0; } th, td { vertical-align: middle; } /* Custom */ a { outline: none; color: #16418a; text-decoration: none; -webkit-backface-visibility: hidden; } a:focus { outline: none; } input:focus, select:focus, textarea:focus { outline: -webkit-focus-ring-color auto 0; } /* Ensure html and body take up full height */ html, body { height: 100%; margin: 0; padding: 0; } body { display: flex; flex-direction: column; } #app { flex: 1; display: flex; flex-direction: column; } - 引入
reset.css,删除默认的style.css
我们直接删掉style.css
引入我们的reset.css
- 验证是否成功
我们看一下我们的 login 页面
发现样式没有了,也不居中了;别慌,也就说明我们上面重置的步骤生效了,接下来头疼的来了,画页面。
不会画页面咋办,那就真的没办法,只能chatgpt、chrome、百度;要不然系统的学一下 html、css 了,我这里就不系统介绍了,后面的就直接贴代码了,自己去挑样式了。
- 创建重置默认标签样式文件
- 登录页样式
效果

.container { display: flex; height: 100%; background-image: url("@/assets/images/login-background.jpg"); background-size: cover; font-size: 1.17em; } .login-container { display: block; max-width: 400px; margin: auto; padding: 20px; background: white; border-radius: 8px; box-shadow: 0 2px 12px rgba(0, 0, 0, 0.1); } .title { margin: 0 auto 30px auto; text-align: center; color: #707070; } .input-height { height: 38px; } .captcha-img { cursor: pointer; border: 1px solid #dcdfe6; height: 36px; } - 主页
- 分析

也就分三个区域,从 element-ui 中选择类似布局
- 实现

配置<script setup> </script> <template> <div class="common-layout"> <el-container> <el-aside width="200px">左边菜单栏</el-aside> <el-container> <el-header>顶部</el-header> <el-main>主区域</el-main> </el-container> </el-container> </div> </template> <style scoped> </style>router看一下效果
{ path: "/index", component: () => import('@/layout/index.vue') },
好像生效了,不明显,那就加个背景色
.common-layout {
  display: flex;
  height: 100%;
}
.el-aside {
  background-color: #334154;
}

.el-header {
  background-color: #ffffff;
}

.el-main {
  background-color: #292d31;
}
可以了。 - 分析
- 侧边导航样式优化
- 菜单正常显示、并且菜单可以折叠
首先我们分析一下样式结构
在没有看ruoyi代码之前,我觉得菜单分两个部分上面的图标和若依管理系统与下面的菜单,但是我这样理解之后发现了一个问题,也就是菜单无法折叠,因为菜单折叠是在element-ui的菜单组件中才有的;因此我将侧边栏整体看成一个部分,单独对第一个菜单项做单独处理。
先看一下我们需要的组件
官网代码如下
我们可以看到是否折叠是根据isCollapse来判断的,我们触发是否折叠折叠的按钮是在另外一个页面,也就是主页面顶部,因此我们需要从另外一个页面触发侧边栏是否折叠。下面我直接给代码,你自己分析一下。sidebar.vue页面
- 菜单正常显示、并且菜单可以折叠
<template>
		   <el-menu
		       background-color="#304156"
		       text-color="#85909f"
		       default-active="1"
		       class="sidebar-menu"
		       :collapse="isCollapse"
		       router
		   >
		     <!--顶部系统信息-->
		     <el-menu-item index="/index" style="height: 56px; padding: 0 20px;">
		       <img src="@/assets/logo/logo.png" style="width: 32px; height: 32px; margin-right: 12px;" alt="logo图片">
		       <span style="font-size: 14px; color: #ffffff">
		             若依管理系统
		         </span>
		     </el-menu-item>
		     <!--首页-->
		     <el-menu-item index="/index">
		       <el-icon>
		         <HomeFilled/>
		       </el-icon>
		       <span>首页</span>
		     </el-menu-item>
		     <!--系统管理-->
		     <el-sub-menu index="/system">
		       <template #title>
		         <el-icon>
		           <Setting/>
		         </el-icon>
		         <span>系统管理</span>
		       </template>
		       <el-menu-item index="/system/user">
		         <el-icon>
		           <User/>
		         </el-icon>
		         <span>用户管理</span></el-menu-item>
		       <el-menu-item index="/system/role">
		         <el-icon>
		           <UserFilled/>
		         </el-icon>
		         <span>角色管理</span></el-menu-item>
		       <el-menu-item index="2-3">
		         <el-icon>
		           <Menu/>
		         </el-icon>
		         <span>菜单管理</span></el-menu-item>
		       <el-menu-item index="2-4">
		         <el-icon>
		           <Share/>
		         </el-icon>
		         <span>部门管理</span></el-menu-item>
		       <el-menu-item index="2-5">
		         <el-icon>
		           <CirclePlusFilled/>
		         </el-icon>
		         <span>岗位管理</span></el-menu-item>
		       <el-menu-item index="2-6">
		         <el-icon>
		           <Notebook/>
		         </el-icon>
		         <span>字典管理</span></el-menu-item>
		       <el-menu-item index="2-7">
		         <el-icon>
		           <Document/>
		         </el-icon>
		         <span>参数设置</span></el-menu-item>
		       <el-menu-item index="2-8">
		         <el-icon>
		           <ChatDotRound/>
		         </el-icon>
		         <span>通知公告</span></el-menu-item>
		       <el-sub-menu index="2-9">
		         <template #title>
		           <el-icon>
		             <Tickets/>
		           </el-icon>
		           <span>日志管理</span></template>
		         <el-menu-item index="2-9-1">
		           <el-icon>
		             <Memo/>
		           </el-icon>
		           <span>操作日志</span></el-menu-item>
		         <el-menu-item index="2-9-2">
		           <el-icon>
		             <DataLine/>
		           </el-icon>
		           <span>登录日志</span></el-menu-item>
		       </el-sub-menu>
		     </el-sub-menu>
		   <!--系统监控-->
		   <el-sub-menu index="3">
		     <template #title>
		       <el-icon><Monitor /></el-icon>
		       <span>系统监控</span>
		     </template>
		     <el-menu-item index="3-1">
		       <el-icon><DataLine /></el-icon>
		       <span>在线用户</span></el-menu-item>
		     <el-menu-item index="3-2">
		       <el-icon><Postcard /></el-icon>
		       <span>定时任务</span></el-menu-item>
		     <el-menu-item index="3-3">
		       <el-icon><TrendCharts /></el-icon>
		       <span>数据监控</span></el-menu-item>
		     <el-menu-item index="3-4">
		       <el-icon>
		         <Share/>
		       </el-icon>
		       <span>缓存监控</span></el-menu-item>
		     <el-menu-item index="3-5">
		       <el-icon>
		         <CirclePlusFilled/>
		       </el-icon>
		       <span>缓存列表</span></el-menu-item>
		   </el-sub-menu>
		   </el-menu>
		 </template>

		 <script lang="ts" setup>
		 import {
		   Document,
		   Setting,
		   HomeFilled,
		   User,
		   UserFilled,
		   Share,
		   CirclePlusFilled,
		   Notebook,
		   ChatDotRound,
		   Tickets,
		   Memo,
		   DataLine,
		   Menu, Monitor, Postcard, TrendCharts,
		 } from '@element-plus/icons-vue'
		 import { defineProps } from 'vue';

		 // 是否菜单塌陷 true:塌陷,false:不塌陷
		 const props = defineProps({
		   isCollapse: {
		     type: Boolean,
		     required: true
		   }
		 })

		 </script>

		 <style lang="scss">
		 .el-menu-vertical-demo:not(.el-menu--collapse) {
		   width: 200px;
		   min-height: 400px;
		 }
		 .sidebar-menu {
		   height: 100%;
		   border: 0;
		 }
		 span {
		   font-size: 13px;
		 }
		 .logo-container {
		   display: flex;
		   width: 100%;
		   height: 50px;
		   align-items: center;
		   justify-content: center;
		 }

		 .logo-container img {
		   width: 32px;
		   height: 32px;
		   margin-right: 12px;
		 }
		 </style>
- 获取全部的路由,然后从路由中提取出菜单信息,这个菜单信息是有层级结构的(警告不影响,这里就忽略了)

mainMenuItems的具体结构如下[ { "index": "/index", "title": "首页", "icon": "HomeFilled", "name": "index", "children": null }, { "index": "/system", "title": "系统管理", "icon": "Setting", "name": "", "children": [ { "index": "/user", "title": "用户管理", "icon": "User", "name": "system-user", "children": null }, { "index": "/role", "title": "角色管理", "icon": "UserFilled", "name": "system-role", "children": null }, { "index": "/menu", "title": "菜单管理", "icon": "Menu", "name": "system-menu", "children": null }, { "index": "/dept", "title": "部门管理", "icon": "Share", "name": "system-dept", "children": null }, { "index": "/position", "title": "岗位管理", "icon": "CirclePlusFilled", "name": "system-position", "children": null }, { "index": "/dict", "title": "字典管理", "icon": "Notebook", "name": "system-dict", "children": null }, { "index": "/param", "title": "参数设置", "icon": "Document", "name": "system-param", "children": null }, { "index": "/notify", "title": "通知公告", "icon": "ChatDotRound", "name": "system-notify", "children": null }, { "index": "/log", "title": "日志管理", "icon": "Tickets", "name": "system-log", "children": [ { "index": "/operation", "title": "操作日志", "icon": "Memo", "name": "system-log-operation", "children": null }, { "index": "/login", "title": "登录日志", "icon": "DataLine", "name": "system-log-login", "children": null } ] } ] } ] - 改造页面,将
mainMenuItems的数据渲染上去
里面有个方法getIconComponent是获取图标的,如果我们直接将图标的字符串放上是不生效的。
⚠️注意:我这里一开始的时候是确定了菜单只有三层,所以这里的代码适用于小于等于3层;如果你的大于三层,只需要在最后一层中自己接着套娃. - 菜单路径

OK,完成<div class="menu-fold-other"> <!-- 面包屑 --> <div class="breadcrumb"> <el-breadcrumb separator="/"> <el-breadcrumb-item v-for="(item, index) in route.matched" :key="index"> {{ item.meta.title }} </el-breadcrumb-item> </el-breadcrumb> </div> </div> <script setup> import { useRoute, useRouter } from "vue-router"; const route = useRoute(); </script>
- 顶部标签页
细节说明一下:
- 点击
新的菜单才会出现,重复点击不会再创建信息的首页是固定的第一个,不可以删除- 有多个标签页面被打开,强制刷新页面时,其他页面会被关闭,当前页面会被保留
- 鼠标点击标签页面,菜单会切换到对应的菜,当选中的标签页的菜单处于折叠状态,会帮你打开折叠定位到对应的菜单

这里是 element-ui-标签页 对应的标签页
具体代码
   <div>
     <el-tabs
              v-model="editableTabsValue"
              type="card"
              class="demo-tabs"
              @tab-remove="removeTab"
              @tab-click="tabClick"
              >
       <el-tab-pane
                    v-for="item in editableTabs"
                    :closable="item.closable"
                    :key="item.name"
                    :label="item.title"
                    :name="item.name"
                    >
       </el-tab-pane>
     </el-tabs>
   </div>
这里面的方法如下:
<script setup>
     import Sidebar from "@/layout/sidebar.vue";
     import { DArrowRight } from "@element-plus/icons-vue";
     import { ref, watch } from 'vue';
     import { useRoute, useRouter } from "vue-router";

     // 获取全部路由
     const router = useRouter();
     // 获取当前路由
     const route = useRoute();

     // 初始化菜单是否折叠
     const isCollapse = ref(false);

     // 菜单是否折叠切换
     const menuFold = async () => {
       isCollapse.value = !isCollapse.value;
     };

     // 初始化标签页定位
     const editableTabsValue = ref('index');
     // 初始化标签页
     const editableTabs = ref([
       {
         title: '首页',
         name: 'index',
         path: '/index',
         closable: false
       },
     ]);

     // 当前选中的菜单项
     const activeIndex = ref(router.currentRoute.value.path);

     // 标签页点击跳转
     const tabClick = (event) => {
       const tabs = editableTabs.value;
       const tab = tabs.find(tab => tab.name === event.props.name);
       if (tab) {
         router.push(tab.path);
         activeIndex.value = tab.path; // 更新菜单选中项
       }
     };

     // 添加标签页
     const addTab = (obj) => {
       let existingTab = editableTabs.value.find(tab => tab.path === obj.path);
       if (!existingTab) {
         editableTabs.value.push({
           title: obj.title,
           name: obj.name,
           path: obj.path,
           closable: true
         });
         console.log(obj)
         console.log(editableTabs.value.name)
         editableTabsValue.value = obj.name;
         router.push(obj.path);
       } else {
         editableTabsValue.value = existingTab.name;
         router.push(existingTab.path);
       }
       activeIndex.value = obj.path; // 更新菜单选中项
     };

     // 移除标签页
     const removeTab = (targetName) => {
       const tabs = editableTabs.value;
       let activeName = editableTabsValue.value;
       if (activeName === targetName) {
         tabs.forEach((tab, index) => {
           if (tab.name === targetName) {
             const nextTab = tabs[index + 1] || tabs[index - 1];
             if (nextTab) {
               activeName = nextTab.name;
               router.push(nextTab.path);
             }
           }
         });
       }
       editableTabsValue.value = activeName;
       editableTabs.value = tabs.filter((tab) => tab.name !== targetName);
       activeIndex.value = editableTabs.value.find(tab => tab.name === activeName)?.path || '/index'; // 更新菜单选中项
     };

     // 点击菜单添加标签页
     const handleMenuItemClick = (menuItem) => {
       addTab({
         title: menuItem.title,
         path: menuItem.index,
         name: menuItem.name
       });
     };

     // 页面加载时根据路径恢复标签页
     watch(route, () => {
       const currentPath = route.path;
       const existingTab = editableTabs.value.find(tab => tab.path === currentPath);
       if (!existingTab) {
         // 如果不存在当前路径对应的标签页,添加新标签页
         addTab({
           title: route.meta.title || '新标签页', // 根据实际需要设置标签页标题
           path: currentPath,
           name: currentPath
         });
       } else {
         // 如果存在,激活该标签页
         editableTabsValue.value = existingTab.name;
       }
       activeIndex.value = currentPath; // 更新菜单选中项
     }, {immediate: true});
     </script>
⚠️注意一下,我们需要点击标签页,反向选中菜单,因此我们需要告诉菜单页面的我们当前选中是哪个页面
在layout/index.vue中有一行代码,是用来获取当前页面的路径信息
 // 当前选中的菜单项
 const activeIndex = ref(router.currentRoute.value.path);
然后将这个参数传递给sidebar.vue页面
sidebar.vue页面接收一下参数
页面上加上这个参数就可以了
效果
用户管理页面

我会做那些内容?
- 左边区域部门列表树,上面的搜索框可以做查询
- 右边,上面的筛选框,包括
用户名称、手机号码、状态、创建时间增删改查导出按钮不做,但是哪一行中最后边的隐藏/展示列表列按钮会做- 简单的列表会做
最终的简易效果
- 左右布局
使用 element-ui-布局
调整一下左右的宽度,通过:span参数,注意element-ui的布局将一行拆成了24分,自己写的时候注意一下
   <script setup>
   </script>

   <template>
     <el-row>
       <el-col :span="6" style="padding: 0 10px; min-width: 100px" class="user-left">
       </el-col>
       <el-col :span="18" class="user-right">
       </el-col>
     </el-row>
   </template>

   <style scoped lang="scss">
   .user-left {
     height: 100px;
     background-color: #3A71A8;
   }
   .user-right {
     height: 100px;
     background-color: red;
   }
   </style>
- 左边部门
效果
 <script setup>
   import {  Search, } from '@element-plus/icons-vue'
   import { ref, watch, reactive } from 'vue'
   import { ElTree } from 'element-plus'

   const filterText = ref('')
   const treeRef = ref()

   const defaultProps = {
     children: 'children',
     label: 'label',
   }

   watch(filterText, (val) => {
     treeRef.value.filter(val)
   })

   const filterNode = (value, data) => {
     if (!value) return true
     return data.label.includes(value)
   }

   const dept_data = [
     {
       label: '若依科技',
       children: [
         {
           label: '深圳总公司',
           children: [
             {
               label: '研发部门',
             },
           ],
         },
       ],
     }
   ]

   </script>

   <template>
     <el-row>
       <el-col :span="6" style="padding: 0 10px; min-width: 100px">
         <el-input
             v-model="filterText"
             style="width: 100%; margin-bottom: 20px;"
             placeholder="请输入部门名称"
         >
           <template #prefix>
             <el-icon class="el-input__icon"><search /></el-icon>
           </template>
         </el-input>
         <el-tree
             ref="treeRef"
             style="max-width: 600px;"
             class="filter-tree"
             :data="dept_data"
             :props="defaultProps"
             default-expand-all
             :filter-node-method="filterNode"
             empty-text="暂无数据"
         />
       </el-col>
     </el-row>
   </template>

   <style scoped lang="scss">

   .user-right {
     height: 100px;
     background-color: red;
   }
   </style>
- 右边筛选
效果
   <script setup>
   import { Refresh, Search, } from '@element-plus/icons-vue'
   import { ref, watch, reactive } from 'vue'
   import { ElTree } from 'element-plus'

   const filterText = ref('')
   const treeRef = ref()

   const defaultProps = {
     children: 'children',
     label: 'label',
   }

   watch(filterText, (val) => {
     treeRef.value.filter(val)
   })

   const filterNode = (value, data) => {
     if (!value) return true
     return data.label.includes(value)
   }

   const dept_data = [
     {
       label: '若依科技',
       children: [
         {
           label: '深圳总公司',
           children: [
             {
               label: '研发部门',
             },
           ],
         },
       ],
     }
   ]

   // 右边

   const formInline = reactive({
     user: '',
     region: '',
     date: '',
   })

   const onSubmit = () => {
     console.log('submit!')
   }

   const refresh = () => {
     console.log('refresh!')
   }
   </script>

   <template>
     <el-row>
       <el-col :span="6" style="padding: 0 10px; min-width: 100px">
         <el-input
             v-model="filterText"
             style="width: 100%; margin-bottom: 20px;"
             placeholder="请输入部门名称"
         >
           <template #prefix>
             <el-icon class="el-input__icon"><search /></el-icon>
           </template>
         </el-input>
         <el-tree
             ref="treeRef"
             style="max-width: 600px;"
             class="filter-tree"
             :data="dept_data"
             :props="defaultProps"
             default-expand-all
             :filter-node-method="filterNode"
             empty-text="暂无数据"
         />
       </el-col>
       <el-col :span="18" class="user-right">
         <div>
           <el-form :inline="true" :model="formInline" class="demo-form-inline">
             <el-form-item label="用户名称">
               <el-input v-model="formInline.user" placeholder="请输入用户名称" clearable />
             </el-form-item>
             <el-form-item label="手机号码">
               <el-input v-model="formInline.user" placeholder="请输入用户名称" clearable />
             </el-form-item>
             <el-form-item label="状态">
               <el-select v-model="formInline.region" placeholder="用户状态" clearable>
                 <el-option label="正常" value="0" />
                 <el-option label="停用" value="1" />
               </el-select>
             </el-form-item>
             <el-form-item label="创建时间">
               <el-date-picker
                   v-model="formInline.date"
                   type="monthrange"
                   clearable
                   range-separator="-"
                   start-placeholder="开始日期"
                   end-placeholder="结束日期"
               />
             </el-form-item>
             <el-form-item>
               <el-button type="primary" @click="onSubmit" :icon="Search">搜索</el-button>
               <el-button type="info" @click="refresh" :icon="Refresh" text bg>重置</el-button>
             </el-form-item>
           </el-form>
         </div>
       </el-col>
     </el-row>
   </template>

   <style scoped lang="scss">
   .el-row {
     margin-bottom: 20px;
   }
   .el-row:last-child {
     margin-bottom: 0;
   }
   .el-col {
     border-radius: 4px;
   }

   .grid-content {
     border-radius: 4px;
     min-height: 36px;
   }

   .demo-form-inline .el-input {
     --el-input-width: 220px;
   }

   .demo-form-inline .el-select {
     --el-select-width: 220px;
   }

   el-button {
     border: 1px solid black;
   }

   .table-container {
     position: relative;
   }
   </style>
- 表单数据
效果(这里只是单纯的数据展示,操作按钮是没有效果的)
<script setup>
   import { Refresh, Search, Setting } from '@element-plus/icons-vue'
   import { ref, watch, reactive } from 'vue'
   import { ElTree } from 'element-plus'

   const filterText = ref('')
   const treeRef = ref()

   const defaultProps = {
     children: 'children',
     label: 'label',
   }

   watch(filterText, (val) => {
     treeRef.value.filter(val)
   })

   const filterNode = (value, data) => {
     if (!value) return true
     return data.label.includes(value)
   }

   const dept_data = [
     {
       label: '若依科技',
       children: [
         {
           label: '深圳总公司',
           children: [
             {
               label: '研发部门',
             },
           ],
         },
       ],
     }
   ]

   // 右边

   const formInline = reactive({
     user: '',
     region: '',
     date: '',
   })

   const onSubmit = () => {
     console.log('submit!')
     console.log(columns)
   }

   const refresh = () => {
     console.log('refresh!')
   }

   const tableData = [
     {
       date: '2016-05-03',
       name: 'Tom',
       address: 'No. 189, Grove St, Los Angeles',
       sex: '男'
     },
     {
       date: '2016-05-02',
       name: 'Tom',
       address: 'No. 189, Grove St, Los Angeles',
       sex: '男'
     },
     {
       date: '2016-05-04',
       name: 'Tom',
       address: 'No. 189, Grove St, Los Angeles',
       sex: '男'
     },
     {
       date: '2016-05-01',
       name: 'Tom',
       address: 'No. 189, Grove St, Los Angeles',
       sex: '男'
     },
   ]

   const columns = reactive([
     { label: '日期', prop: 'date' },
     { label: '姓名', prop: 'name' },
     { label: '地址', prop: 'address' },
   ])


   </script>

   <template>
     <el-row>
       <el-col :span="6" style="padding: 0 10px; min-width: 100px">
         <el-input
             v-model="filterText"
             style="width: 100%; margin-bottom: 20px;"
             placeholder="请输入部门名称"
         >
           <template #prefix>
             <el-icon class="el-input__icon"><search /></el-icon>
           </template>
         </el-input>
         <el-tree
             ref="treeRef"
             style="max-width: 600px;"
             class="filter-tree"
             :data="dept_data"
             :props="defaultProps"
             default-expand-all
             :filter-node-method="filterNode"
             empty-text="暂无数据"
         />
       </el-col>
       <el-col :span="18" class="user-right">
         <div>
           <el-form :inline="true" :model="formInline" class="demo-form-inline">
             <el-form-item label="用户名称">
               <el-input v-model="formInline.user" placeholder="请输入用户名称" clearable />
             </el-form-item>
             <el-form-item label="手机号码">
               <el-input v-model="formInline.user" placeholder="请输入用户名称" clearable />
             </el-form-item>
             <el-form-item label="状态">
               <el-select v-model="formInline.region" placeholder="用户状态" clearable>
                 <el-option label="正常" value="0" />
                 <el-option label="停用" value="1" />
               </el-select>
             </el-form-item>
             <el-form-item label="创建时间">
               <el-date-picker
                   v-model="formInline.date"
                   type="monthrange"
                   clearable
                   range-separator="-"
                   start-placeholder="开始日期"
                   end-placeholder="结束日期"
               />
             </el-form-item>
             <el-form-item>
               <el-button type="primary" @click="onSubmit" :icon="Search">搜索</el-button>
               <el-button type="info" @click="refresh" :icon="Refresh" text bg>重置</el-button>
             </el-form-item>
           </el-form>
         </div>
         <div class="table-container">
           <el-table :data="tableData" style="width: 100%">
             <el-table-column
                 v-for="(item, index) in columns"
                 :key="index"
                 :prop="item.prop"
                 :label="item.label"
                 width="180"
             />
             <el-table-column label="操作">
               <el-button size="small" @click="">编辑</el-button>
               <el-button size="small" type="danger" @click="">删除</el-button>
             </el-table-column>
           </el-table>
         </div>
       </el-col>
     </el-row>
   </template>

   <style scoped lang="scss">
   .el-row {
     margin-bottom: 20px;
   }
   .el-row:last-child {
     margin-bottom: 0;
   }
   .el-col {
     border-radius: 4px;
   }

   .grid-content {
     border-radius: 4px;
     min-height: 36px;
   }

   .demo-form-inline .el-input {
     --el-input-width: 220px;
   }

   .demo-form-inline .el-select {
     --el-select-width: 220px;
   }

   el-button {
     border: 1px solid black;
   }

   .table-container {
     position: relative;
   }
   </style>
- 隐藏/显示列按钮
⚠️注意封装了会将这个按钮封装成组件
组件的实现思路:
我只需要将我需要
使用该页面的唯一名称和展示的列数据作为参数,将选中列存储到pinia中,使用该页面的唯一名称作为 key,选中列作为 value,使用的页面获取选中的数据只需要从指定的store中的一个方法,参数使用该页面的唯一名称就可以获取列信息,然后使用者自己将这些选中列的数据和默认的选中的数据组合成新的数据就可以展示了。
效果
创建组件页面components/tableColumn.vue
创建组件页面components/tableColumn.vue
<script setup>
   import {defineEmits, defineProps, ref, watch} from "vue";
   import {Grid} from "@element-plus/icons-vue";
   import {tableColumnStore} from "@/store/index.js";

   // 获取 pinia 对象
   const tableColumn = tableColumnStore()

   // 页面传递参数
   const props = defineProps({
     // 使用者的 Key
     usedKey: {
       type: String,
       required: true
     },
     allParam: {
       type: Array,
       required: true
     }
   });

   // 获取当前页面的参数
   const usedValue = tableColumn.getUsedValue(props.usedKey)

   // 初始化全部参数
   const allParam = ref(props.allParam)
   // 初始化选中参数
   const selectedParam =  ref(usedValue['selectedParam'])
   // 初始化全选按钮
   const checkAll = ref(false)
   // 初始化弹窗关闭
   const popoverVisible = ref(false);

   // 选择列
   const changeParam = (val) => {
     selectedParam.value = val
   }
   // 全选 / 全不选
   const checkAllChange = (val) => {
     selectedParam.value = val ? allParam.value.map(item => item.prop) : [];
   }
   // 重置
   const reset = () => {
     selectedParam.value = []
   }

   const emit = defineEmits(['confirmSelectedParam']);

   // 确认
   const confirm = () => {
     usedValue['selectedParam'] = selectedParam.value
     tableColumn.setUsedValue(usedValue)
     popoverVisible.value = false

     const result = selectedParam.value.map(item => {
       return allParam.value.find(obj => obj.prop === item);
     });

     emit('confirmSelectedParam', result);
   }

   const cancel = () => {
     selectedParam.value = [...usedValue['selectedParam']];
     popoverVisible.value = false
   }

   // 监听全选按钮
   watch(selectedParam, async (newVal) => {
     try {
       checkAll.value = newVal.length ===  allParam.value.length
     } catch (err) {}
   })
   </script>

   <template>
     <el-popover placement="left" trigger="click" v-model:visible="popoverVisible">
       <div style="display: flex; justify-content: space-between;align-items: center;">
         <el-checkbox v-model="checkAll" @change="checkAllChange">列展示</el-checkbox>
         <el-button type="text" @click="reset">重置</el-button>
       </div>
       <el-divider style="margin: 10px 0"/>
       <el-checkbox-group v-model="selectedParam" @change="changeParam">
         <el-checkbox v-for="(item) in allParam" :label="item.label" :key="item.prop" :value="item.prop"></el-checkbox>
       </el-checkbox-group>
       <div style="display: flex; margin-top: 10px; justify-content: flex-end;">
         <el-button type="primary" size="small" @click="confirm">确定</el-button>
         <el-button size="small" @click="cancel">取消</el-button>
       </div>
       <template #reference>
         <el-button type="primary" :icon="Grid" :usedKey="usedKey" circle></el-button>
       </template>
     </el-popover>
   </template>

   <style scoped>
   </style>
完成后的user.vue页面
<script setup>
   import { Refresh, Search, Setting } from '@element-plus/icons-vue'
   import { ref, watch, reactive } from 'vue'
   import { ElTree } from 'element-plus'
   import TableColumn from '@/components/tableColumn.vue';

   const filterText = ref('')
   const treeRef = ref()

   const defaultProps = {
     children: 'children',
     label: 'label',
   }

   watch(filterText, (val) => {
     treeRef.value.filter(val)
   })

   const filterNode = (value, data) => {
     if (!value) return true
     return data.label.includes(value)
   }

   const dept_data = [
     {
       label: '若依科技',
       children: [
         {
           label: '深圳总公司',
           children: [
             {
               label: '研发部门',
             },
           ],
         },
       ],
     }
   ]

   // 右边

   const formInline = reactive({
     user: '',
     region: '',
     date: '',
   })

   const onSubmit = () => {
     console.log('submit!')
     console.log(columns)
   }

   const refresh = () => {
     console.log('refresh!')
   }

   const tableData = [
     {
       date: '2016-05-03',
       name: 'Tom',
       address: 'No. 189, Grove St, Los Angeles',
       sex: '男'
     },
     {
       date: '2016-05-02',
       name: 'Tom',
       address: 'No. 189, Grove St, Los Angeles',
       sex: '男'
     },
     {
       date: '2016-05-04',
       name: 'Tom',
       address: 'No. 189, Grove St, Los Angeles',
       sex: '男'
     },
     {
       date: '2016-05-01',
       name: 'Tom',
       address: 'No. 189, Grove St, Los Angeles',
       sex: '男'
     },
   ]

   const allColumns = reactive([
     { label: '性别', prop: 'sex' },
   ])

   const columns = reactive([
     { label: '日期', prop: 'date' },
     { label: '姓名', prop: 'name' },
     { label: '地址', prop: 'address' },
   ])

   const currentColumns = ref(columns)
   const confirmSelectedParam = (selectedParam) => {
     currentColumns.value = columns.concat(selectedParam)
   }


   </script>

   <template>
     <el-row>
       <el-col :span="6" style="padding: 0 10px; min-width: 100px">
         <el-input
             v-model="filterText"
             style="width: 100%; margin-bottom: 20px;"
             placeholder="请输入部门名称"
         >
           <template #prefix>
             <el-icon class="el-input__icon"><search /></el-icon>
           </template>
         </el-input>
         <el-tree
             ref="treeRef"
             style="max-width: 600px;"
             class="filter-tree"
             :data="dept_data"
             :props="defaultProps"
             default-expand-all
             :filter-node-method="filterNode"
             empty-text="暂无数据"
         />
       </el-col>
       <el-col :span="18" class="user-right">
         <div>
           <el-form :inline="true" :model="formInline" class="demo-form-inline">
             <el-form-item label="用户名称">
               <el-input v-model="formInline.user" placeholder="请输入用户名称" clearable />
             </el-form-item>
             <el-form-item label="手机号码">
               <el-input v-model="formInline.user" placeholder="请输入用户名称" clearable />
             </el-form-item>
             <el-form-item label="状态">
               <el-select v-model="formInline.region" placeholder="用户状态" clearable>
                 <el-option label="正常" value="0" />
                 <el-option label="停用" value="1" />
               </el-select>
             </el-form-item>
             <el-form-item label="创建时间">
               <el-date-picker
                   v-model="formInline.date"
                   type="monthrange"
                   clearable
                   range-separator="-"
                   start-placeholder="开始日期"
                   end-placeholder="结束日期"
               />
             </el-form-item>
             <el-form-item>
               <el-button type="primary" @click="onSubmit" :icon="Search">搜索</el-button>
               <el-button type="info" @click="refresh" :icon="Refresh" text bg>重置</el-button>
             </el-form-item>
           </el-form>
         </div>
         <div class="table-container">
           <div style="display: flex; justify-content: flex-end;">
             <table-column used-key="userIndex" :all-param="allColumns" @confirmSelectedParam="confirmSelectedParam"></table-column>
           </div>
           <el-table :data="tableData" style="width: 100%">
             <el-table-column
                 v-for="(item, index) in currentColumns"
                 :key="index"
                 :prop="item.prop"
                 :label="item.label"
                 width="180"
             />
             <el-table-column label="操作">
               <el-button size="small" @click="">编辑</el-button>
               <el-button size="small" type="danger" @click="">删除</el-button>
             </el-table-column>
           </el-table>
         </div>
       </el-col>
     </el-row>
   </template>

   <style scoped lang="scss">
   .el-row {
     margin-bottom: 20px;
   }
   .el-row:last-child {
     margin-bottom: 0;
   }
   .el-col {
     border-radius: 4px;
   }

   .grid-content {
     border-radius: 4px;
     min-height: 36px;
   }

   .demo-form-inline .el-input {
     --el-input-width: 220px;
   }

   .demo-form-inline .el-select {
     --el-select-width: 220px;
   }

   el-button {
     border: 1px solid black;
   }

   .table-container {
     position: relative;
   }
   </style>
tableConlume.js
import { defineStore } from 'pinia'
   import { ref } from 'vue'

   export const tableColumnStore = defineStore(
     // store 唯一标识
     'tableColumn',
     // 对外暴露信息
     () => {
       // token 初始化
       const tableColumn = ref({})

       // 获取
       const getUsedValue = (usedKey) => {
         return tableColumn.value[usedKey] ? tableColumn.value[usedKey] : { selectedParam: [] }
       }


       // 设置
       const setUsedValue = (userKey, usedValue) => {
         tableColumn.value['usedKey'] = usedValue
       }

       // 移除
       const removeUsedValue = (userKey) => {
         tableColumn.value['usedKey'].selectedParam = []
       }

       // 对外提供 store 信息
       return {
         getUsedValue,
         setUsedValue
       }
     },
     // 选项配置
     {
       persist: false // 持久化
     }
   )
暂时完结
没做完为什么完结?
- 是
暂时完结,因为时间不太充裕。- 个人认为主要设计的内容已经完成(基本布局、接口对接、组件封装、数据持久化)
- 后续有时间的话会继续完成后续(大概率不会全部实现)
是否认为烂尾?
答案是:不认为。
因为我会将代码上传的
github上(包含全后端代码,有人需要练手不是很好的例子吗?刚好主要的都有实例参考,还可以新手练习代码只会在
github上,gitee暂时不会上传

快速构建 Web 应用程序
更多推荐


 4
4 0
0- 0


 已为社区贡献1条内容

所有评论(0)